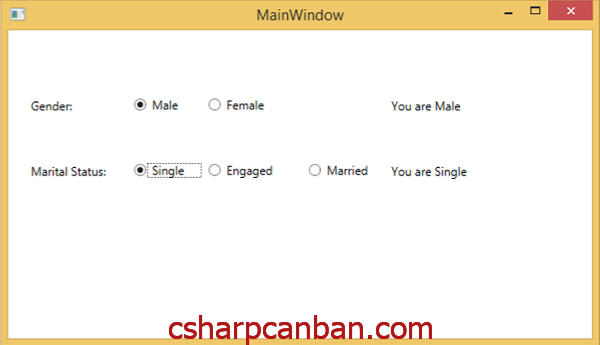
Để sử dụng Checkbox trong WPF như hình trên, các bạn thực hiện theo các bước như dưới đây:
Bước 1: Tạo một dự án WPF mới
Bước 2: Thêm đoạn mã XAML như dưới đây
<Window x:Class="WpfApplication16.MainWindow"
        xmlns="http://schemas.microsoft.com/winfx/2006/xaml/presentation"
        xmlns:x="http://schemas.microsoft.com/winfx/2006/xaml"
        Title="MainWindow" Height="350" Width="525">
    <Grid>
        <RadioButton Content="Dogs"
                     Checked="RadioButton_Checked"
                     HorizontalAlignment="Left"
                     Margin="10,10,0,0"
                     VerticalAlignment="Top"/>
        <RadioButton Content="Cats"
                     Checked="RadioButton_Checked"
                     HorizontalAlignment="Left"
                     Margin="10,30,0,0"
                     VerticalAlignment="Top"/>
    </Grid>
</Window>
Bước 3: Bổ sung đoạn code C# như sau:
using System.Windows;
using System.Windows.Controls;

namespace WpfApplication16
{
    /// <summary>
    /// Interaction logic for MainWindow.xaml
    /// </summary>
    public partial class MainWindow : Window
    {
        public MainWindow()
        {
            InitializeComponent();
        }

        private void RadioButton_Checked(object sender, RoutedEventArgs e)
        {
            // ... Get RadioButton reference.
            var button = sender as RadioButton;

            // ... Display button content as title.
            this.Title = button.Content.ToString();
        }
    }
}
Bước 4: Nhấn F5 để chạy chương trình và thu được kết quả như trên hình
Chúc các bạn ngày mới vui vẻ.


